
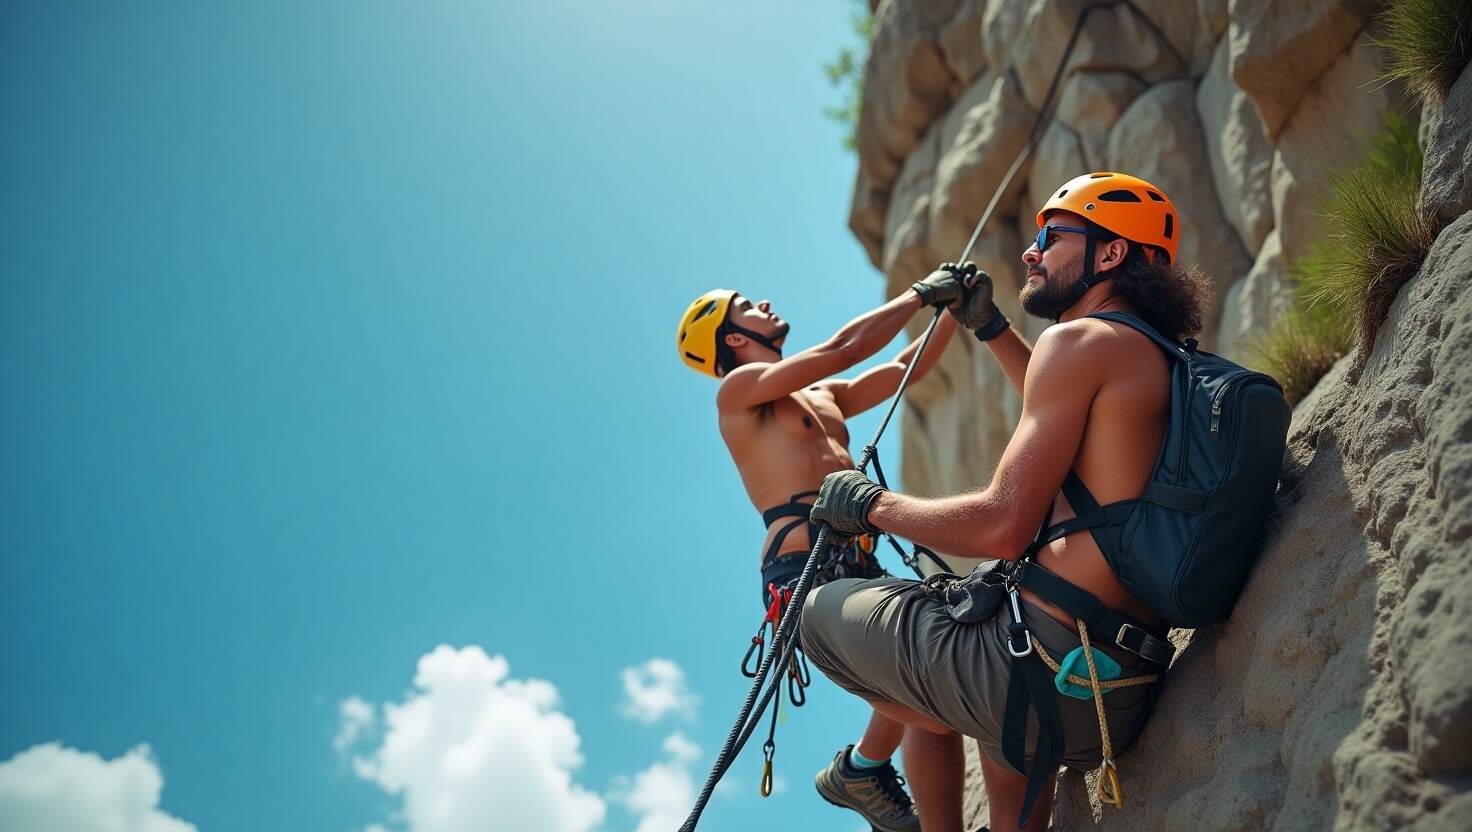
Imagine standing at the base of a climbing wall, your palms sweaty as you grip the rope, your best friend inching higher above you. Every move they make depends on you—their belayer—to keep them safe.
It’s a rush like no other, blending adrenaline, responsibility, and trust. Belaying is the heart of rock climbing, letting climbers chase heights with confidence, knowing you’ve got their back. But if you’re new to this, the stakes can feel overwhelming. No worries—this guide is here to help. We’ll break down how to belay safely with clear, beginner-friendly steps, from choosing gear to mastering the PBUS method. Packed with expert tips, real-world stories, and safety stats, this article will set you up to belay like a pro and join the climbing community with confidence.
What is Belaying and Why It Matters
Belaying is the act of managing a rope to protect a climber from falling, using a belay device to control tension and catch falls. It’s a cornerstone of rock climbing safety, whether you’re in a gym or on a crag. The belayer’s role is to keep the rope taut, catch falls, and lower the climber safely. Beyond technique, belaying builds trust between partners, creating a partnership where communication and focus are paramount.
Why is belaying so critical? According to the American Alpine Club (AAC), over 50% of climbing accidents involve belaying errors, such as improper rope management or lack of attention. These mistakes can lead to serious injuries or worse. Mastering safe belaying techniques not only protects your climbing partner but also fosters confidence and teamwork. For beginners, learning to belay properly is the first step to becoming a skilled, reliable climber.
Essential Gear for Safe Belaying
Before you start belaying, you need the right equipment. Each piece plays a vital role in ensuring safety and efficiency. Here’s what you’ll need:
- Harness: A snug-fitting climbing harness with double-back buckles is essential. Check that it’s comfortable and properly adjusted to avoid slippage.
- Belay Device: This controls the rope and catches falls. Beginners often prefer the Petzl GriGri+ for its assisted-braking feature, which reduces errors by 30% compared to tube-style devices like the Black Diamond ATC, according to OutdoorGearLab (2025). The ATC is simpler and more affordable, ideal for budget-conscious climbers.
- Locking Carabiner: A sturdy, auto-locking carabiner connects the belay device to your harness. Ensure it’s rated for climbing (22 kN or higher).
- Climbing Rope: Dynamic ropes, designed to stretch and absorb fall energy, are standard for top-rope climbing. Check for wear and tear before use.
- Optional: A ground anchor for belayers significantly lighter than the climber, preventing upward pulls during falls (AMGA recommendation).
New to climbing? Many gyms offer gear rentals, saving you from upfront costs. For example, a basic ATC costs around $20, while a GriGri+ retails for $120-$150. Renting lets you try before you buy, ensuring you choose gear suited to your needs.
Step-by-Step Guide to Belaying Safely Using the PBUS Method
The PBUS (Pull, Brake, Under, Slide) method is the gold standard for top-rope belaying, endorsed by the American Mountain Guides Association (AMGA) for its simplicity and reliability. Follow these steps to belay safely:
- Pre-Climb Safety Checks:
- Harness: Ensure both climber and belayer’s harnesses are snug, with buckles doubled back.
- Knots: Verify the climber’s figure-8 follow-through knot is tied correctly and backed up with a stopper knot.
- Carabiner: Confirm the locking carabiner is secure and locked. AMGA instructor Matt Vodjansky emphasizes double-checking knots and carabiners to prevent accidents.
- Partner Check: Both climber and belayer should inspect each other’s setup.
- Set Up the Belay Device:
- Load the rope into your belay device (e.g., ATC or GriGri) following manufacturer instructions. For an ATC, ensure the rope forms a loop with the brake strand exiting downward.
- Attach the device to your harness’s belay loop with a locking carabiner.
- Test the setup by pulling the rope to ensure smooth operation.
- Master the PBUS Technique:
- Pull: Use your guide hand to take in slack as the climber ascends, keeping the rope taut but not restrictive.
- Brake: Lock off the rope by bringing the brake strand down with your brake hand, ready to catch a fall.
- Under: Move your guide hand under the brake hand to secure the rope.
- Slide: Slide the brake hand back up the rope, maintaining control.
- A Colorado climbing gym reported a 20% reduction in belaying incidents after mandating PBUS training, per REI (2022).
- Communication Commands:
- Use clear, standardized commands: “On belay?” (climber) / “Belay on” (belayer); “Climbing” (climber) / “Climb on” (belayer).
- In crowded gyms, use names (e.g., “Sarah, on belay?”) to avoid confusion.
- Before lowering, confirm: “Ready to lower?” / “Lower.”
- Lowering the Climber:
- Gradually release the brake strand to lower the climber smoothly, controlling speed with your brake hand.
- Keep the rope taut to prevent swings or sudden drops.
For visual learners, check out REI’s YouTube tutorial on belaying or download our pre-climb safety checklist to ensure you never miss a step.
Common Belaying Mistakes and How to Avoid Them
Even with the best intentions, beginners can make mistakes that compromise safety. Here are three common errors and how to prevent them:
- Releasing the Brake Hand:
- Problem: Letting go of the brake strand can result in a climber falling unchecked. AMGA guidelines stress never releasing the brake hand.
- Solution: Practice PBUS until it becomes second nature. Use a GriGri for added security, as its assisted-braking engages automatically.
- Excessive Slack:
- Problem: Too much slack increases fall distance, raising injury risk. A 2021 Climbing Magazine case study described a 15-foot fall in Yosemite due to excessive slack.
- Solution: Keep the rope taut, pulling in slack as the climber moves. Practice on easy routes to develop rhythm.
- Improper Lock-Off:
- Problem: Failing to lock off the rope properly can prevent catching a fall effectively.
- Solution: IFMGA guide Rob Coppolillo recommends tying a catastrophe knot (e.g., a mule knot) as a backup for high-risk scenarios, especially outdoors.
Regular practice and instructor feedback can help you avoid these pitfalls and build solid habits.
Tips for Building Confidence as a Beginner Belayer
Belaying can feel overwhelming for newcomers, but these strategies will help you gain confidence:
- Start in a Controlled Environment: Practice in a climbing gym with an instructor to receive real-time feedback. Gyms like Sportrock offer beginner-friendly belay classes.
- Begin with Easy Routes: Focus on low-grade routes to master PBUS without the pressure of complex climbs.
- Communicate Clearly: Open dialogue with your climbing partner builds trust and reduces anxiety. Discuss commands and expectations before starting.
- Use Backup Techniques: Tie a catastrophe knot for peace of mind, especially when belaying a heavier climber.
- Embrace the Partnership: Belaying is like a trust exercise in team sports—it strengthens bonds and shared goals. This mindset can ease nerves and make the experience rewarding.
One beginner shared on X: “My first belay was terrifying, but practicing PBUS in a gym made me feel like a pro in weeks!” Consistent practice is key to feeling at ease.
The Importance of In-Person Belay Training
While this guide provides a solid foundation, online resources are no substitute for hands-on training. The AMGA and REI stress that in-person instruction is critical for mastering safe belaying techniques. Certified instructors can correct form, teach nuanced skills, and simulate real-world scenarios, such as catching a fall or managing weight differences. Many climbing gyms, like Sportrock, require belay certification tests before allowing independent belaying, ensuring all climbers meet safety standards.
For example, Cornell University’s climbing program mandates a belay course for all new members, covering PBUS, gear checks, and communication. These programs reduce accidents and build a culture of safety. To find a course near you, check with local gyms or AMGA-certified programs. Investing in training not only boosts your skills but also opens doors to climbing communities.
Conclusion
Belaying is more than holding a rope—it’s about trust, focus, and keeping your climbing partner safe. By mastering the PBUS method, choosing the right gear, and avoiding common mistakes, you’ll build the skills and confidence to belay effectively. Remember: over 50% of climbing accidents stem from belaying errors, so practice and vigilance are non-negotiable. Start your journey in a gym with a certified instructor, and use our downloadable safety checklist to stay on track.


[…] Tip: Always inspect gear for wear and ensure it meets international safety standards. A faulty device or rope can compromise […]
Is the 91jlappdownloadapk legit? Downloaded it, but a little worried about safety. Anyone else using it? Let’s discuss at 91jlappdownloadapk.
Been trying out 888pbet and so far, so good! The site is easy to navigate, and they seem to have a good selection. Worth checking out if you’re looking for something new. Find it here: 888pbet.
Brxbet1 is my latest discovery. It’s got a slick design and the odds seem pretty competitive. I’m giving it a shot, and you might want to too! Check it out at brxbet1.
Mais uma opção pra recarregar no QH88! Que a sorte esteja ao seu lado nas apostas. nạp tiền qh88 qh88.vet
K11.net is worth a look. I checked out quite a few games and found a couple of real gems. Give it a try, you might like it. You can find it here: k11.net
Partiu jogar no SSGame! Ver se hoje a gente desencanta e consegue uns pontinhos extras. ssgame
ДВС и КПП https://vavtomotor.ru автозапчасти для автомобилей с гарантией и проверенным состоянием. В наличии двигатели и коробки передач для популярных марок, подбор по VIN, быстрая доставка и выгодные цены.
дизайн прихожей в квартире хрущевка 2 комнатная дизайн
Гидроизоляция подземного резервуара https://underground-reservoirs.ru
Лучшее казино https://download-vavada.ru слоты, настольные игры и live-казино онлайн. Простая навигация, стабильная работа платформы и доступ к играм в любое время без установки дополнительных программ.