The figure 8 knot, often called the Flemish knot, is a cornerstone of knot-tying, celebrated for its strength, reliability, and versatility across activities like rock climbing, sailing, and rescue operations.
For beginners, mastering this knot is a gateway to safe and confident participation in these pursuits. Its distinctive “8” shape makes it easy to inspect, ensuring safety in high-stakes scenarios. According to 101Knots.com, the figure 8 knot retains 75-80% of a rope’s strength, making it a preferred choice over weaker alternatives like the overhand knot. This guide offers a clear, step-by-step tutorial tailored for novices, complete with practical tips, safety advice, and real-world applications to help you tie the knot with confidence. Whether you’re scaling a cliff or securing a sail, this article will equip you with the skills to succeed.
What Is a Figure 8 Knot and Why It Matters
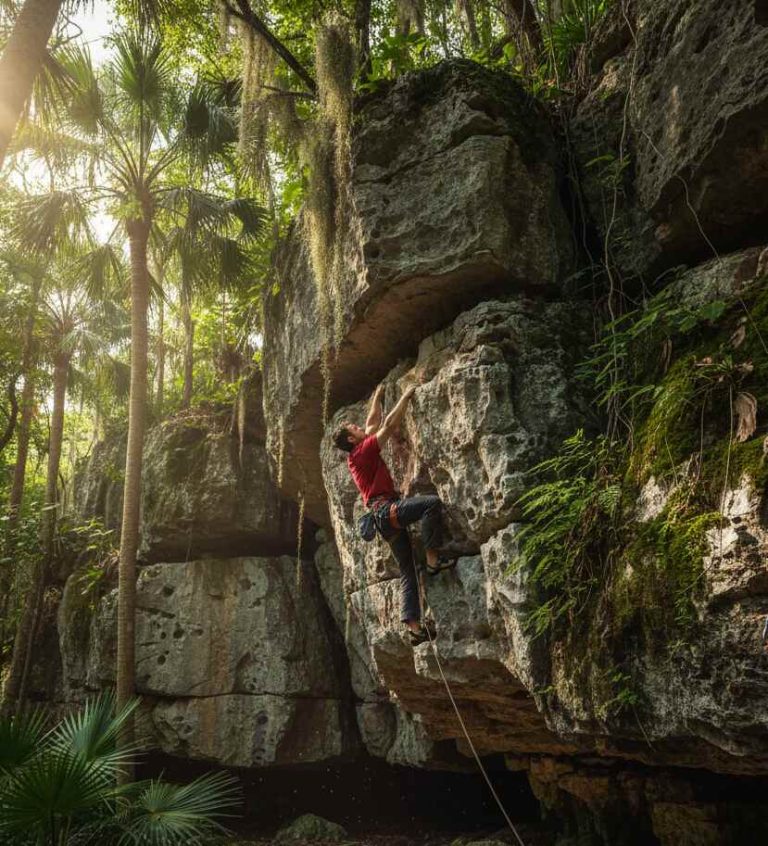
The figure 8 knot is a stopper knot that forms a loop resembling the number eight, used to prevent ropes from slipping through devices or to secure ropes to anchors. Its strength and simplicity make it a staple in outdoor activities. In climbing, the figure 8 follow-through is the standard for tying into a harness, with Climbing.com noting that 90% of climbers rely on it for its inspect ability and reliability. In sailing, it serves as a stopper knot to secure lines, while rescue teams use it to create secure loops for heavy loads. The American Alpine Club reports that improper knot-tying contributes to over 30 climbing fatalities annually in North America, underscoring the knot’s role in safety.
- Climbing: Secures climbers to harnesses, reducing accident risks.
- Sailing: Prevents lines from slipping through pulleys or blocks.
- Rescue: Supports heavy loads in search and rescue operations.
- Versatility: Forms the basis for variations like the figure 8 bend.
Understanding the knot’s purpose builds a foundation for beginners, ensuring they appreciate its critical role in safety and functionality.
Tools and Materials Needed
Before tying a figure 8 knot, gather the right equipment to ensure success. The choice of materials depends on your activity, but quality gear is non-negotiable for safety.
- Climbing Rope: Use a dynamic rope (10-11mm diameter) for climbing to absorb shock, or a nylon rope for sailing, as recommended by REI. For practice, a 1/4” utility rope from SGT Knots is ideal.
- Climbing Harness: Essential for climbing applications, with tie-in points for the knot (check manufacturer guidelines).
- Fixed Object: For sailing or practice, use a docking post or carabiner to secure the knot.
- Optional Carabiner: Useful for attaching the knot to anchors in climbing or rescue scenarios.
Investing in quality ropes enhances the knot’s performance. For example, dynamic ropes are designed to stretch under load, reducing stress on the knot, while nylon ropes offer durability for marine environments.
Step-by-Step Instructions: Tying a Figure 8 Follow-Through Knot
The figure 8 follow-through is the go-to knot for climbers tying into a harness. Follow these steps to tie it correctly, ensuring a secure and reliable knot. These instructions are based on expert techniques from Animated Knots and Fox Mountain Guides.
- Form a Bight: About 3 feet (1 meter) from the rope’s end, fold the rope back on itself to create a U-shaped bight.
- Create the Initial Figure 8: Cross the working end (the loose end) over the standing part (the main rope). Wrap it behind and thread it through the loop from the top, forming an “8” shape. Pull gently to tighten.
- Thread Through the Harness: Pass the working end through both tie-in points on your climbing harness (waist and leg loops, per manufacturer instructions).
- Retrace the Knot: Feed the working end back through the initial figure 8, carefully following the original path. Ensure the rope runs parallel to the standing part without crossing strands.
- Dress the Knot: Adjust the knot so all strands are neat and parallel, with no twists. Pull each of the four strands (two top, two bottom) to tighten evenly.
- Check the Tail: Leave at least 6-8 inches (15-20 cm) of tail to prevent slippage. Tie a simple overhand stopper knot against the figure 8 for added security.
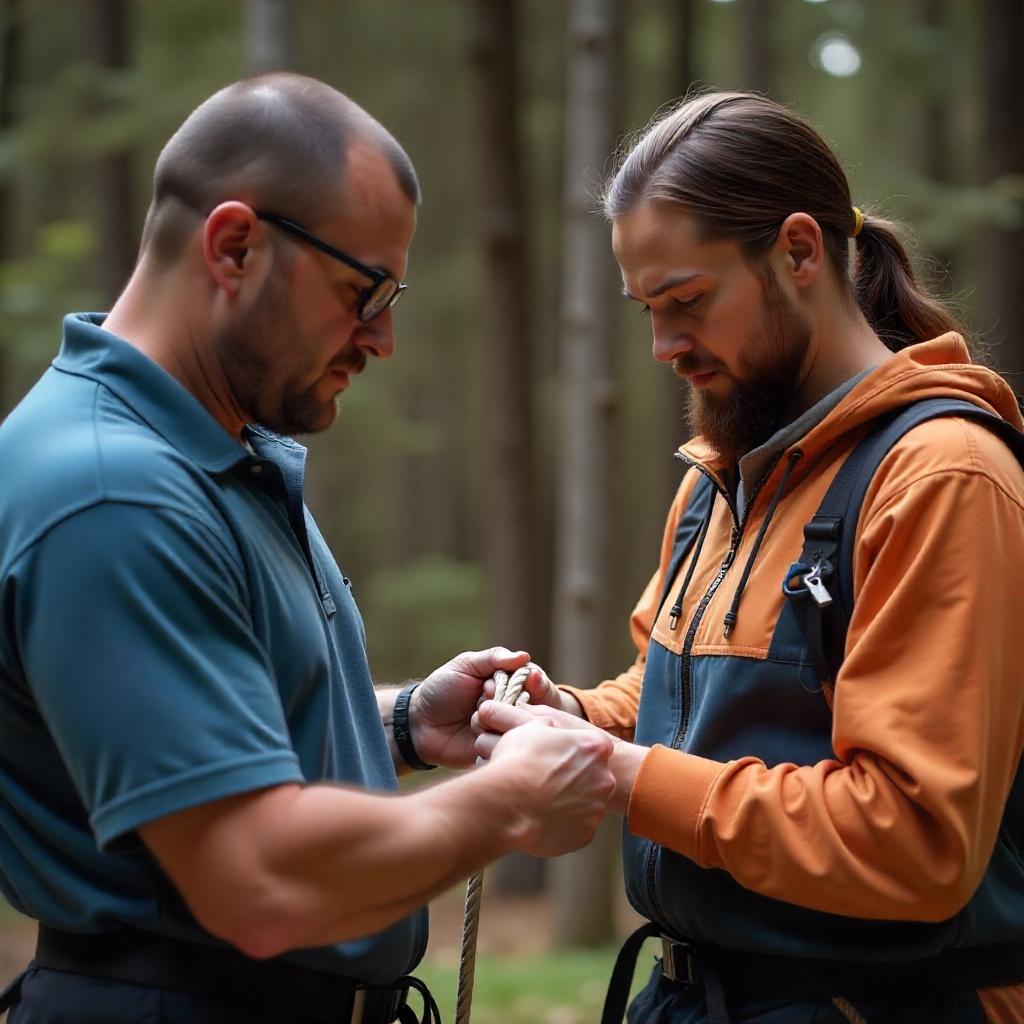
- Inspect the Knot: Verify the knot has five sets of parallel lines (a climbing standard, per Fox Mountain Guides). Have a partner double-check for accuracy.
For visual learners, watch a trusted tutorial like Animated Knots’ video on the figure 8 follow-through. The final knot should be symmetrical and snug, with no crossed strands. Practice these steps repeatedly to build muscle memory.
Common Mistakes to Avoid When Tying a Figure 8 Knot
Beginners often make errors that can compromise the knot’s safety. Avoiding these mistakes, as highlighted by AlpineSavvy.com and Climbing.com, ensures a secure knot.
- Crossed Strands: Twisting the rope during retracing weakens the knot. Always follow the original path precisely.
- Short Tail Length: A tail shorter than 6 inches risks slipping under load. Measure carefully before tightening.
- Distractions: A famous case from Climbing.com recounts Lynn Hill’s near-fatal fall due to a distracted, incomplete figure 8 knot. Focus fully while tying.
- Loose Knot: Failing to dress the knot properly can cause slippage. Pull each strand to ensure a tight, neat knot.
To avoid these errors, practice in a calm environment and double-check your work. A partner’s inspection can catch mistakes you might miss.
Overcoming Beginner Anxiety: Tips for Confidence
Learning the figure 8 knot can feel intimidating, especially for safety-critical activities like climbing. These tips, inspired by VDiff Climbing and climbing forums, help beginners build confidence and overcome anxiety.
- Practice at Home: Use a budget-friendly utility rope to tie the knot repeatedly in a low-stakes setting. This builds familiarity without pressure.
- Buddy System: Have a friend or mentor check your knot, as VDiff Climbing recommends. A second pair of eyes ensures accuracy.
- Blindfold Challenge: Practice tying the knot blindfolded to simulate low-visibility conditions, enhancing muscle memory.
- Start Small: Begin with non-critical tasks, like securing a tarp, before using the knot in climbing or sailing.
These strategies address emotional barriers, making the learning process approachable and empowering. Confidence comes from repetition and support, so don’t hesitate to practice with a community or instructor.
Real-World Applications of the Figure 8 Knot
The figure 8 knot’s versatility makes it invaluable across outdoor activities. Here are practical examples of its use, drawing from SGT Knots and 101Knots.com.
- Climbing: A beginner at a local gym used the figure 8 follow-through to tie into their harness, safely completing their first top-rope climb. The knot’s reliability gave them confidence to focus on technique.
- Sailing: During a regatta, a novice sailor secured a halyard with a figure 8 stopper knot, preventing the line from slipping through a pulley and ensuring smooth sail adjustments.
- Rescue: Firefighters rely on the figure 8 follow-through to create secure loops for lifting heavy loads, as its strength supports critical operations.
These examples show the knot’s real-world impact, making it relatable for beginners eager to apply their skills.
Safety Tips for Using the Figure 8 Knot
Safety is paramount when tying the figure 8 knot, especially in high-risk activities. These tips, backed by the American Alpine Club and REI, ensure secure use.
- Double-Check Always: Inspect your knot and have a partner verify it. The American Alpine Club notes that knot errors contribute to 30% of climbing accidents.
- Choose Quality Ropes: Use dynamic ropes for climbing or nylon ropes for sailing to optimize knot performance. Check manufacturer weight limits.
- Avoid Overloading: Exceeding the rope’s capacity can cause failure, even with a strong knot. Verify specifications before use.
- Learn from Experts: Enroll in a climbing or sailing course to practice under supervision, reducing the risk of errors.
Prioritizing safety builds trust in the knot and your abilities, ensuring worry-free adventures.
Frequently Asked Questions
Addressing common queries enhances SEO and meets user needs, based on People Also Ask and forum insights.
- How is the figure 8 knot different from a bowline?
The figure 8 knot is stronger (75-80% efficiency) and easier to inspect but harder to untie than the bowline, which needs a stopper knot for security. - Can I use the figure 8 knot for sailing?
Yes, it’s widely used as a stopper knot to prevent lines from slipping through pulleys or blocks. - How do I know my knot is tied correctly?
Check for five sets of parallel lines and a 6-inch tail. A symmetrical, snug knot indicates proper tying.
Conclusion
Mastering the figure 8 knot is a pivotal skill for beginners in climbing, sailing, and rescue operations. Its strength, reliability, and ease of inspection make it a trusted choice for securing ropes safely. By following this step-by-step guide, avoiding common mistakes, and practicing with confidence, you’ll be ready to tackle outdoor adventures with assurance. Download our infographic for a quick reference, and share your knot-tying journey on social media using #Figure8Knot to inspire others. Whether you’re scaling a rock face or setting sail, the figure 8 knot is your key to safety and success. Start practicing today, and join the community of knot-tying enthusiasts!